User Guide
Updated on 08.01.2025
In this guide
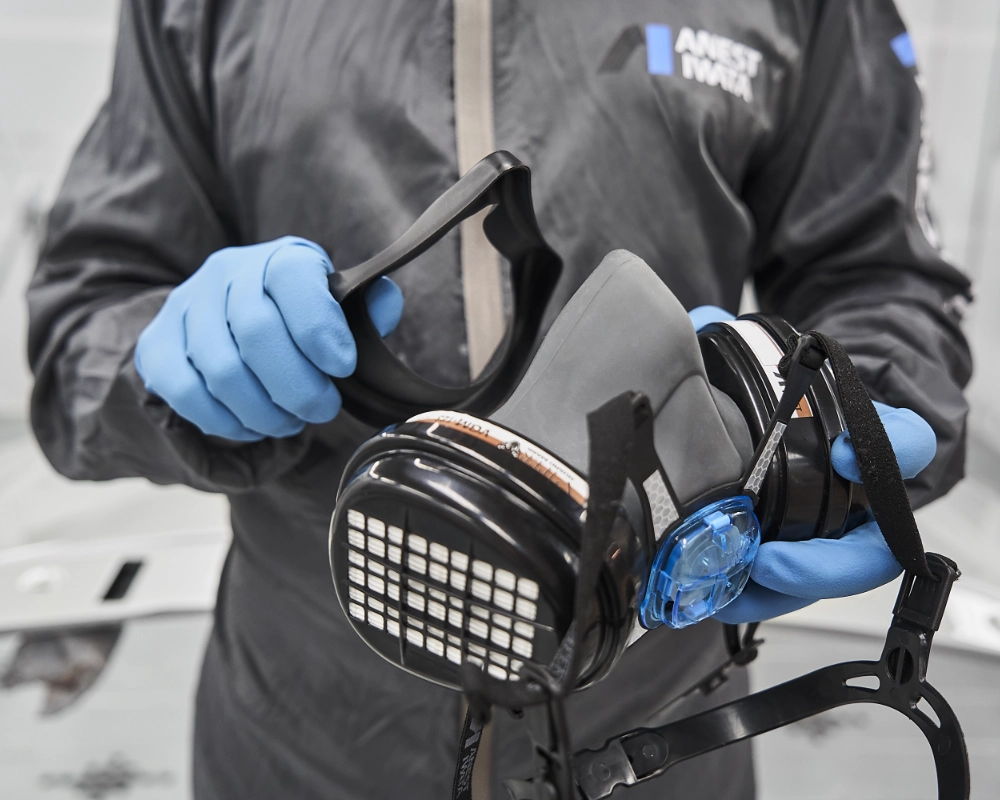
1. RIGID TRANSIT PROTECTION REMOVING
Remove the rigid transit and storage protective packaging from face seal.
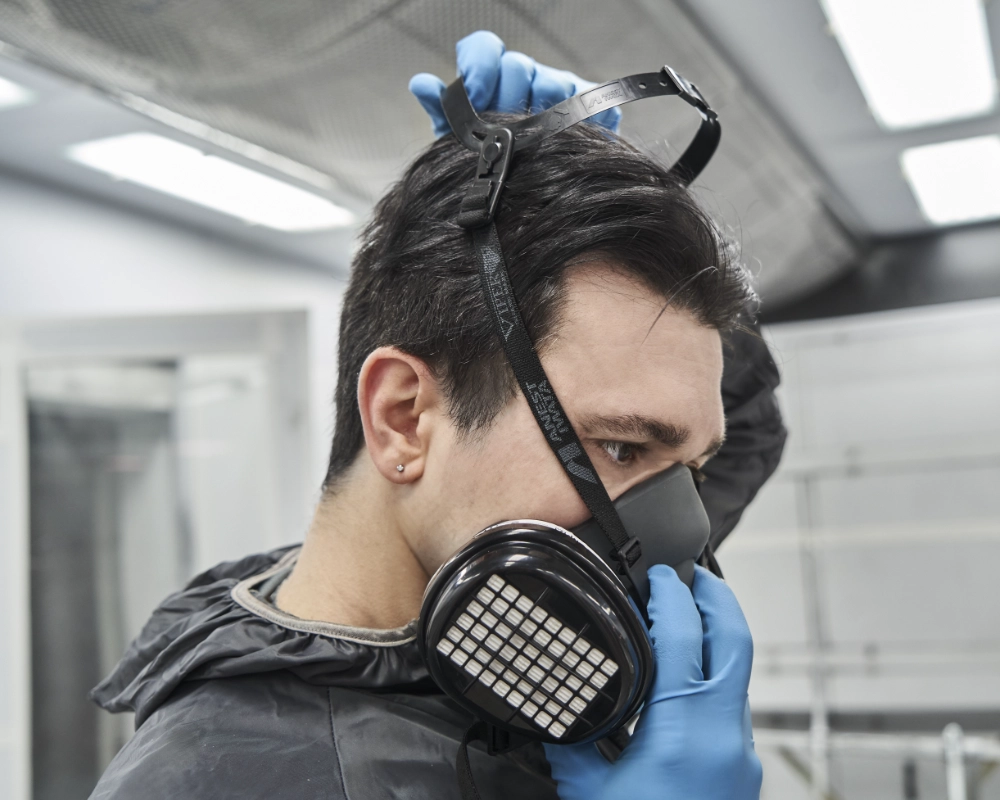
2. HEAD HARNESS PLACING
Ensure that the elastic is not twisted and that it is securely held in all mounting positions.
Position the half-mask against your face, then place the head harness over the top .
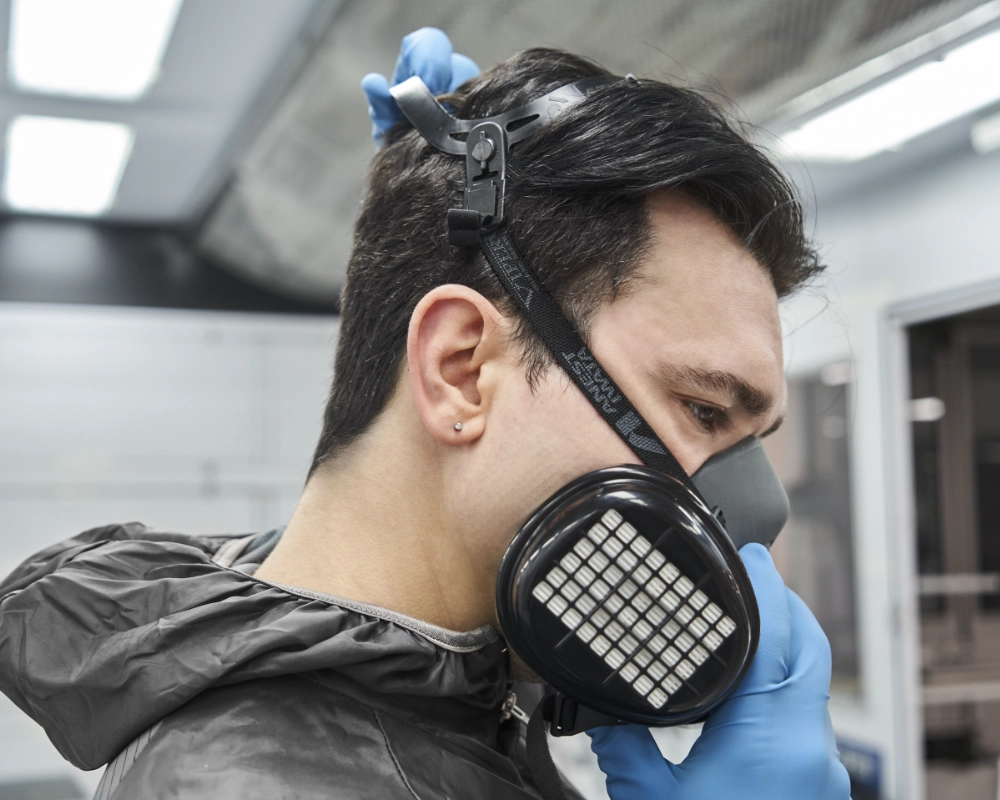
3. HEAD HARNESS ADJUSTING
Adjust the head harness to make sure you have a comfortable secure fit of the mask to your face.
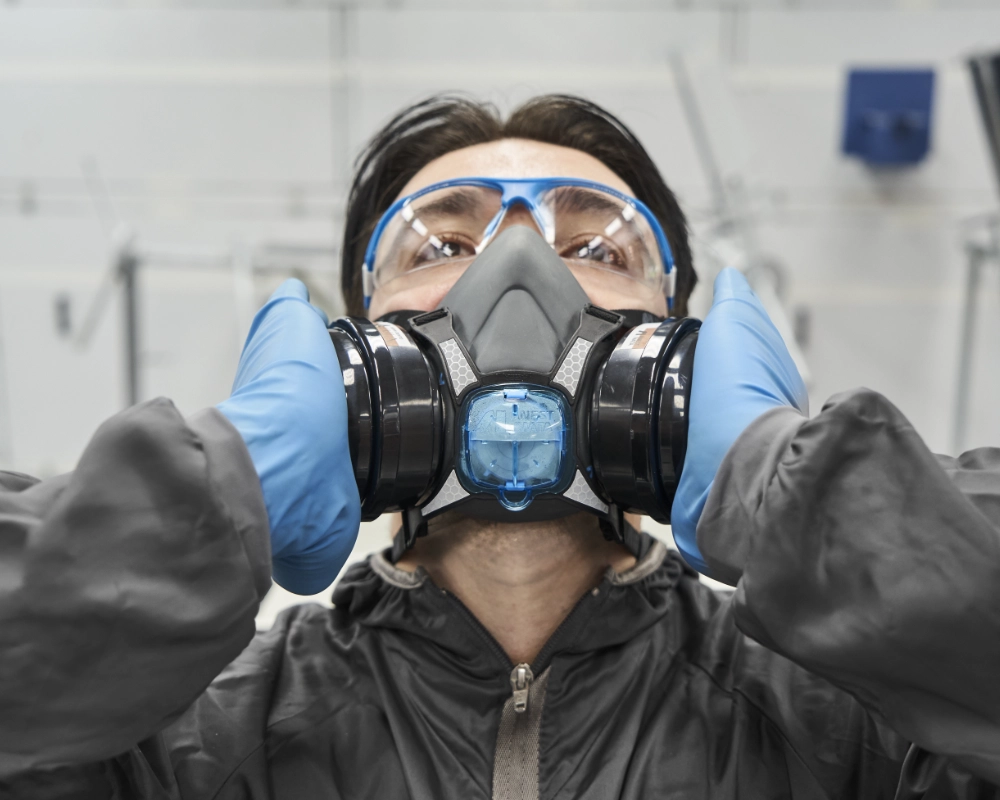
4. FACE SEAL HOLDING
Pull the head harness elastics to make sure you have a correct seal of the mask.

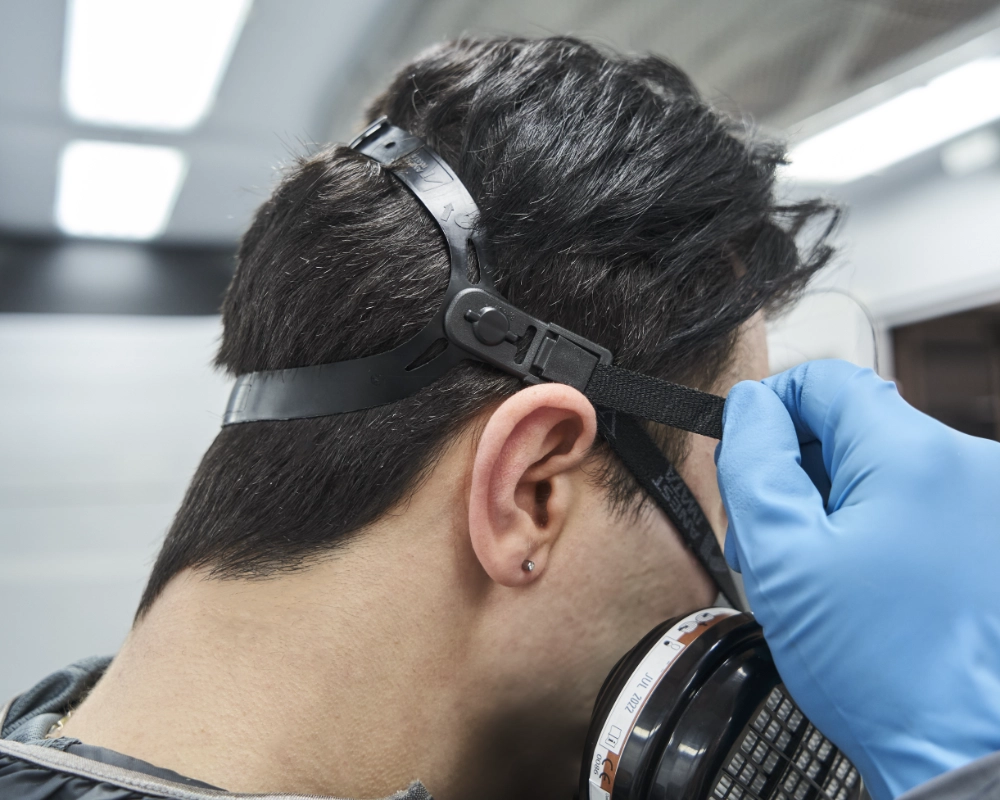
5. CLIPS PLACING
Secure the clips of the elastic straps at the back of the neck.

6. CLIPS HOOKING
Close the rear clips by hooking them behind your neck.
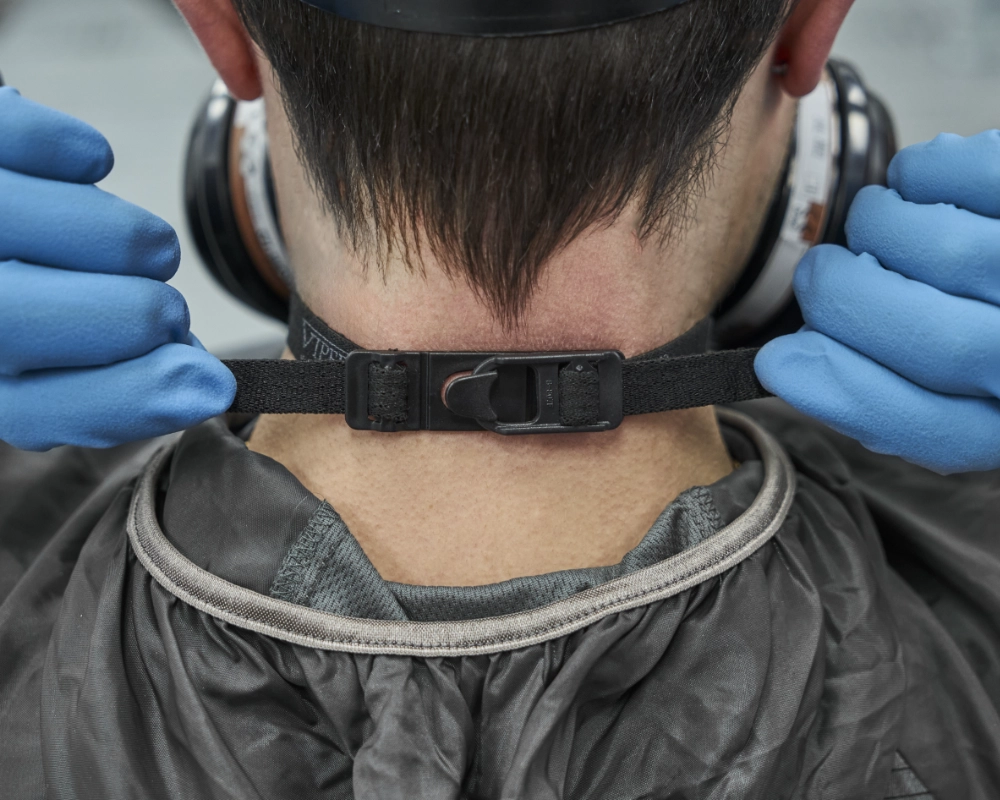
7. NECK ELASTICS ADJUSTING
Adjust the neck elastics to make sure you have a correct seal of the mask.
8. FACE SEAL CHECKING
The wearer’s chin should fit comfortably into the bottom of the respirator.
IMPORTANT!
Since this mask may not fit all face shapes perfectly, it is therefore necessary to carry out a “FACE SEAL CHECK” to ensure the mask provides the user with the correct fit.
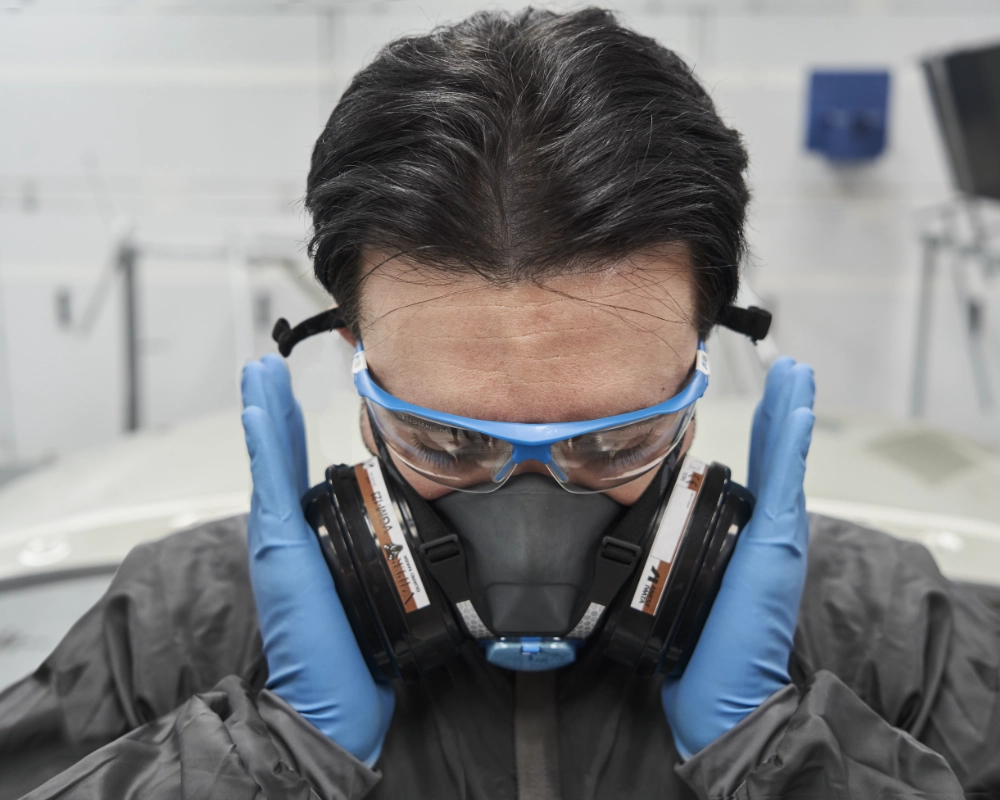
9. CHECK MASK FIT
To check if the mask fits correctly it is necessary to seal the filters and inhale in.
If it fits correcly you can see the distorsion of the rubber seal, as it sucks in to the face.
To complete the check and to ensure the test is accurate, repeat the same procedure in all directions.
Repeat it while looking DOWN

10. READY TO START OPERATION
If the mask draws in at every position during the test, it indicates that the air doesn’t enter in the mask and that the seal is well suited to the contours of your face, ensuring adequate protection.