Setup & Start-up
Updated on 10.03.2026
In this guide
1
1. CONNECTION
- HOPPER CONFIGURATION: Connect the hopper’s U-shaped hose to the pump’s paint inlet joint.
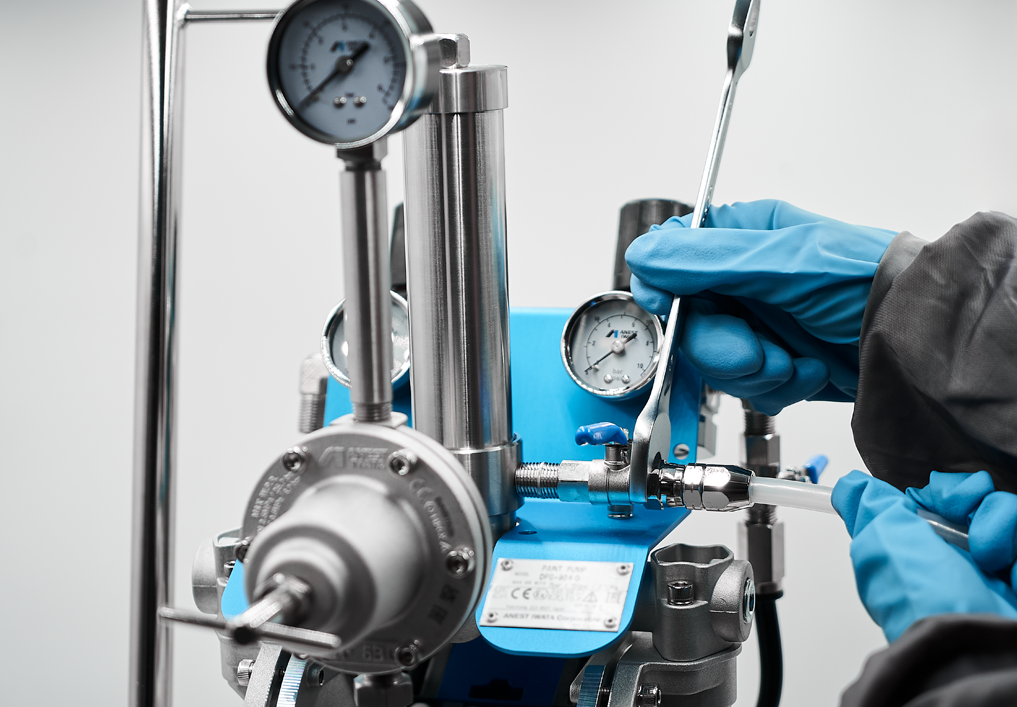
- Firmly connect the hopper’s U-shaped hose to the pump’s paint inlet joint by using a proper open-end wrench.
- FOR ALL OTHER CONFIGURATIONS: Connect the suction hose to the pump’s paint supply joint.
- Firmly screw the suction hose to the pump’s paint supply joint by tighten it using a proper open-end wrench.
- Connect the drain hose to the 2-way valve for paint recirculation.
- Once connected, firmly tighten it by using a proper open-end wrench.
- Connect the paint hose to the paint outlet fitting located on the paint pressure regulator.
- Firmly tighten the paint hose to the paint outlet fitting located on the paint pressure regulator by tighten it using a proper open-end wrench.
- Connect the air supply hose of the pressure spray gun to the air outlet fitting of the air regulator.
- Firmly tighten the air supply hose of the pressure spray gun to the air outlet fitting of the air regulator by using a proper open-end wrench.
- Connect the paint supply hose to the paint inlet joint of the pressure spray gun.
- Firmly tighten the paint supply hose to the paint inlet joint of the pressure spray gun by using a proper open-end wrench.
- Connect the air supply hose to the air inlet joint of the pressure spray gun.
- Firmly tighten the paint supply hose to the paint inlet joint of the pressure spray gun by using a proper open-end wrench.
2
2. SETUP & PRE-WASH
- Connect the main air supply to the air inlet connection of the pump.
- Open the two-way ball valve to supply air to the system and position it in the correct ON direction.
- Immerse the suction tube in the cleaning liquid or, depending on the configuration used, fill the hopper or the tank with the same liquid.
- In the hopper configuration, the drain hose must be placed directly into the hopper. In the other configurations, the cleaning liquid will instead circulate through the drain hose connected to the unit’s suction tube.
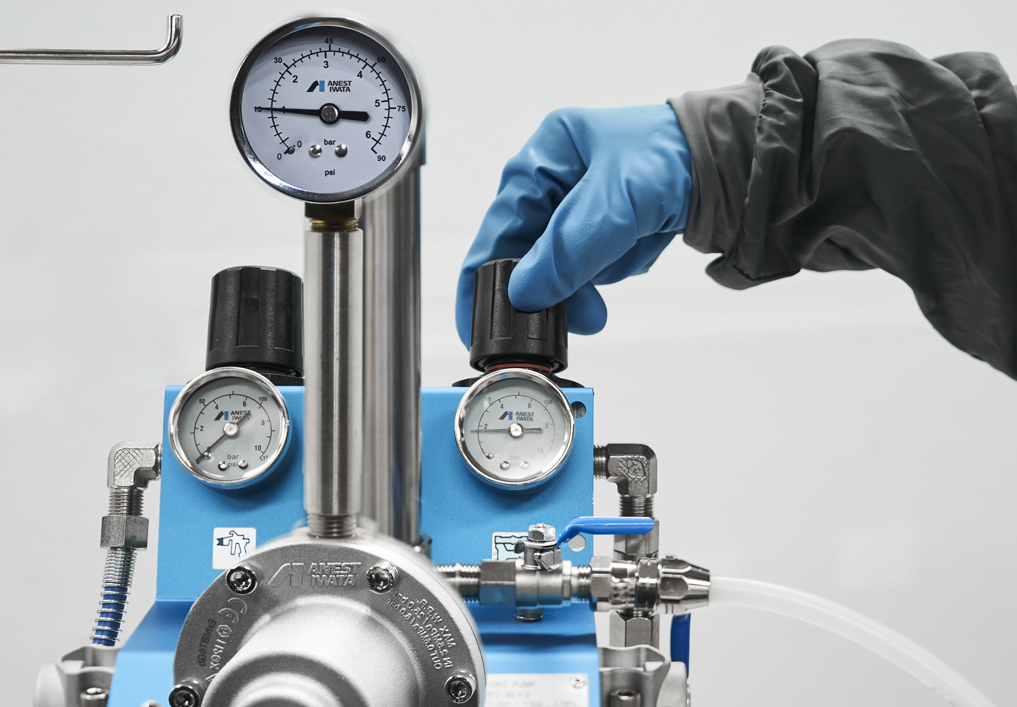
- TO START-UP: To start the pump, lift the air regulator knob on the pump side, and adjust the air inlet pressure to a value between 2.0 and 7.0.
- Gradually open the two-way valve of paint recirculation. The cleaning liquid should flow through the drain hose either back to the hopper or to the suction hose, depending on the configuration used.
- Close the two-way valve for paint recirculation.
- Adjust the fluid pressure using the paint pressure regulator (Recommended pressure for pre-washing: 3.0 bar).
- After starting the pump, adjust the operating pressure to a value lower than the starting pressure to prevent cavitation.
- Open and adjust the air flow valve of the gun to allow the purging of the cleaning liquid from the gun.
- Pull the spray gun trigger without engaging the atomizing air and let the cleaning liquid circulate for a few minutes. Once the cleaning process is complete, fully drain any remaining fluid from the system and stop the pump.
3
3. REGULATIONS & PAINTING START-UP
- Before starting the painting process, fill the hopper or the tank with the product to be sprayed. In configurations with a suction hose, dip the hose directly into the tank containing the product to be pumped.
- During the use with the hopper configuration, ensure the lid is properly sealed to prevent leaks or contamination.
- Gradually open the two-way valve for paint recirculation.
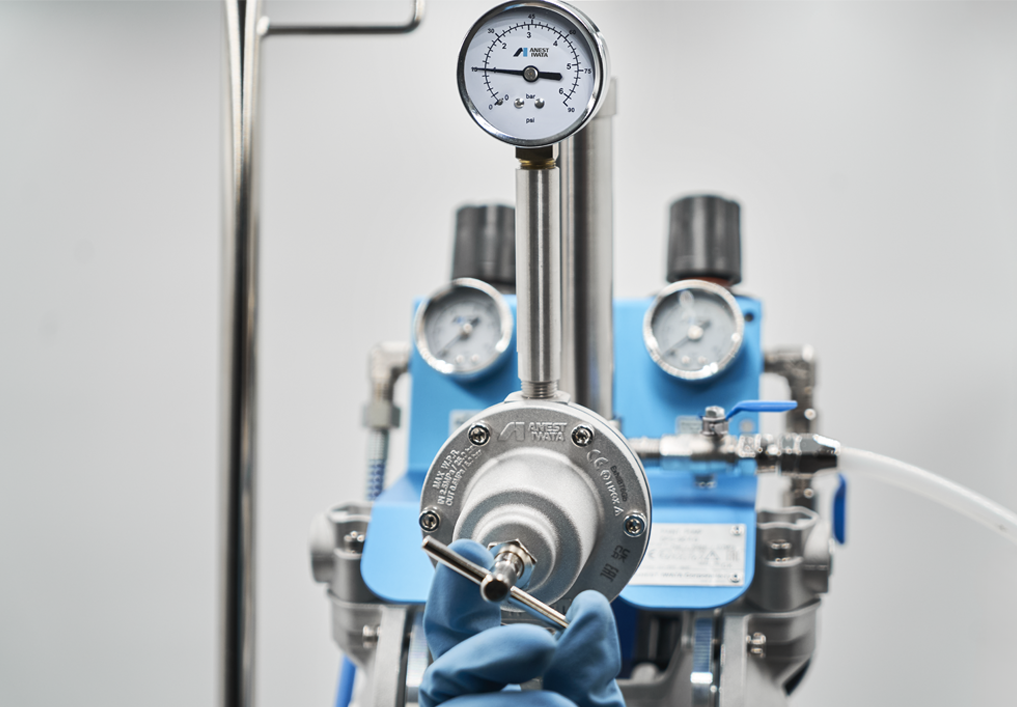
- Lift and gradually turn the pump pressure regulator knob, adjusting the pressure to a value necessary to allow the paint to be loaded into the pump circuits.
- Close the two-way valve for paint recirculation.
- Activate the Pump by means of the pump air regulator knob, setting the pressure to a minimum value of 2 bar.
- Adjust the fluid pressure using the paint pressure regulator.
- Adjust the atomization air using the pressure regulator connected to the spray gun.
- Open and adjust the spray gun air control valve.
- Before use, perform a paint test on a panel, checking and calibrating all atomization settings according to the desired finish requirements.
- Adjust both the paint output using the fluid output regulator and the shape and width of the spray gun pattern using the pattern adjustment knob.